Mazda CX-5 Service & Repair Manual: Floor Under Cover Removal/Installation
1. Lift up the vehicle.
2. Remove bolts A.
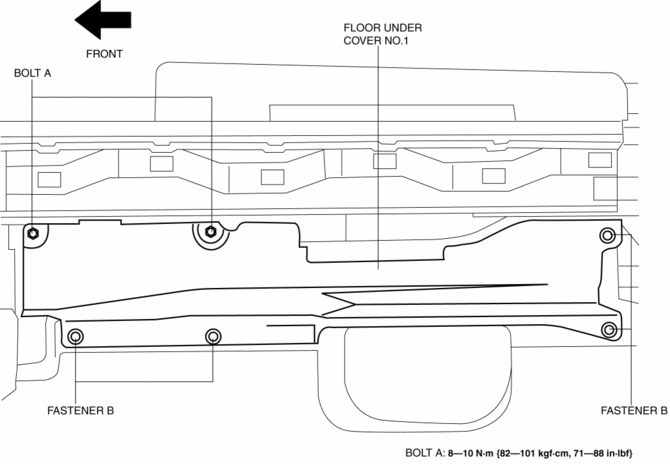
3. Remove fasteners B.
4. Remove the floor under cover No.1.
5. Remove nuts C.

6. Remove fasteners D.
7. Remove bolts E.
8. Remove the floor under cover No.2.
9. Remove bolts F.
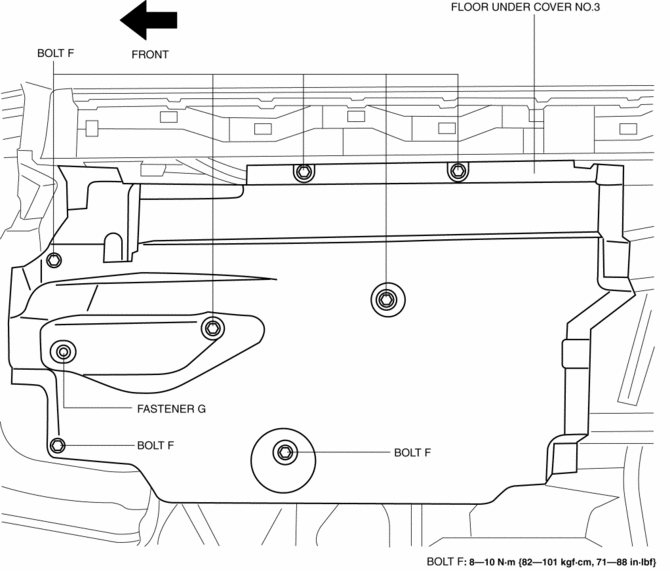
10. Remove the fastener G.
11. Remove the floor under cover No.3.
12. Install in the reverse order of removal.
 Floor Side Panel Removal [Panel Replacement]
Symbol Mark
Removal Procedure
1. Drill the 35 locations indicated by (A) shown in the figure, then remove the
floor side panel No.1.
2. Drill the 5 locations indicated by (B) shown in th ...
 Front Beltline Molding Removal/Installation
CAUTION:
Affix protective tape to the position shown in the figure.
1. Fully open the front door glass.
2. Insert a tape-wrapped flathead screwdriver and then detach clips A in the ...
Other materials:
Front Shock Absorber And Coil Spring Removal/Installation
CAUTION:
Performing the following procedures without first removing the front ABS
wheel-speed sensor may possibly cause an open circuit in the wiring harness
if it is pulled by mistake. Before performing the following procedures, disconnect
the front ABS wheel-speed sensor wiring ...
Oil Seal (Differential) Replacement [C66 M R]
1. Remove the front under cover No.2..
2. Drain the manual transaxle oil..
3. Disconnect the drive shaft (LH) from the MTX..
4. Disconnect the drive shaft (RH) from the MTX..
5. Remove the oil seal (LH).
6. Remove the oil seal (RH).
7. Using the SSTs and a hammer, tap a new oil s ...
DRL (Daytime Running Light) Bulb Removal/Installation
1. Disconnect the negative battery cable..
2. Disconnect the connector.
3. Rotate the DRL bulb in the direction of the arrow (1) shown in the figure
and remove it from the front combination light in the direction of the arrow (2)
shown in the figure.
4. Install in the reverse order ...
