Mazda CX-5 Service & Repair Manual: Engine Mount
Purpose, Function
-
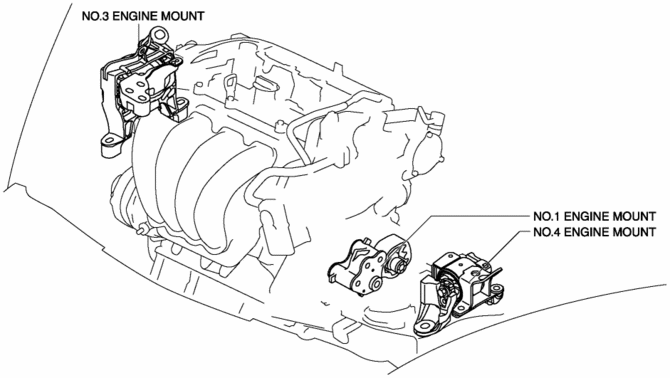
The engine mount secures the engine and transaxle to the vehicle body, reducing vibration and noise.
Construction
-
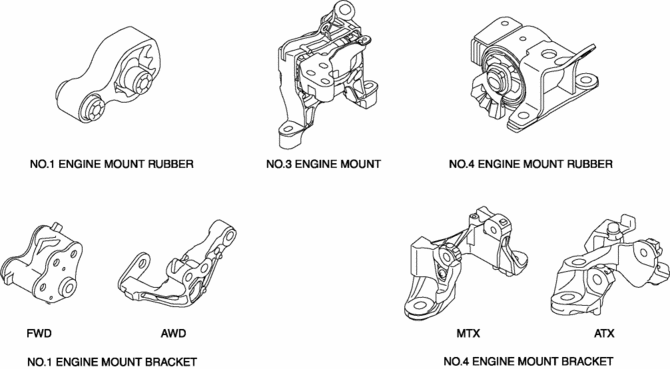
The three points at the engine front (No.3 engine mount), one side of the transaxle (No.1 engine mount), and the rear upper part of the transaxle (No.4 engine mount) are supported.
-
With the adoption of the oil-filled bushing type for the No.3 engine mount and No.4 engine mount rubber, the damper effect has been improved.
Operation
-
By locating the one side of the transaxle (No.1 engine mount) to the transaxle lower end, the No.1 engine mount absorbs the rotation force to the powertrain generated during engine torque fluctuation. The layout is designed to disperse the rotation force to the front/back directions of the engine.

 Engine Mount Disassembly/Assembly
No.1 Engine Mount (2WD)
1. Remove the front under cover No.2..
2. Remove in the order indicated in the table.
3. Install in the reverse order of removal.
1
No.1 engi ...
 Piston Assembly
...
Other materials:
General Procedures (Suspension)
Wheel and Tire Installation
1. When installing the wheels and tires, tighten the wheel nuts in a criss-cross
pattern to the following tightening torque.
Tightening torque
108—147 N·m {12—14 kgf·m, 80—108 ft·lbf}
Suspension Links Removal/Installation
1. For the ...
Cup Holder
WARNING
Never use a cup holder to hold hot liquids while the vehicle is moving:
Using a cup holder to hold hot liquids while the vehicle is moving is dangerous.
If the contents spill, you could be scalded.
Do not put anything other than cups or drink cans in cup holders:
Putting objects other ...
Multiplex Communication System
A controller area network (CAN) system has been adopted in which multiplex
communication is performed using a single communication path.
A high-speed controller area network (HS-CAN) has been adopted for the communication
between the following modules:
PCM
...
