Mazda CX-5 Service & Repair Manual: Door Ajar Warning Light
Purpose
-
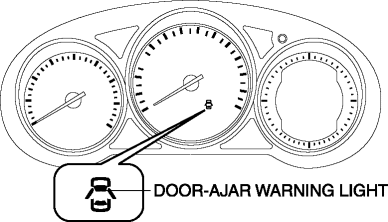
The door-ajar warning light notifies the driver that any door or the liftgate is open.
Function
-
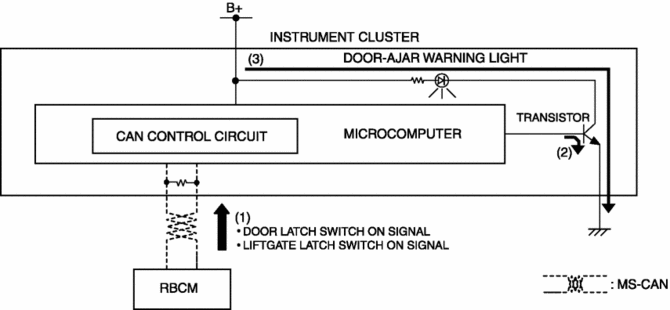
When the instrument cluster receives any of the following signals sent from the rear body control module (RBCM) via the CAN signal, the door-ajar warning light illuminates.
-
Door latch switch ON signal (door open)
-
Liftgate latch switch ON signal (liftgate open)
Construction
-
The instrument cluster controls illumination on/off of the door-ajar warning light using the instrument cluster microcomputer based on the door latch or liftgate latch position signal from the rear body control module (RBCM).
-
The door-ajar warning light is set in the instrument cluster.
Operation
1. The instrument cluster receives (1) the door latch switch ON signal or liftgate latch switch ON signal from the rear body control module (RBCM).
2. The instrument cluster microcomputer turns the transistor on (2) based on each signal.
3. When the transistor turns on, a ground circuit with the door-ajar warning light is established and the door-ajar warning light illuminates (3).
Fail-safe
-
Function not equipped.
 Cruise Set Indicator Light (Green)
Purpose/Function
Illuminates during the cruise control system operation to inform the driver
that the cruise control system is operating.
Construction
Built into the instrument ...
 Engine Oil Pressure Warning Light
Purpose
The engine oil pressure warning light warns the driver that the engine oil
level is insufficient.
Function
When the instrument cluster receives the engine oil pressure w ...
Other materials:
Remote Transmitter Battery Voltage Inspection
NOTE:
Because the remote transmitter battery power cannot be determined using the
battery itself, determine by the remote transmitter battery low warning operation
conditions.
Operation procedure for remote transmitter battery low warning
1. Place the remote transmitter inside t ...
Cruise Main Indicator Light (Amber)
Purpose/Function
Illuminates while the cruise control system is in standby mode to inform
the driver that the cruise control system is on standby.
Construction
Built into the instrument cluster.
Operation
Illuminates while the cruise control system is on sta ...
Power Outer Mirror Switch Inspection
1. Disconnect the negative battery cable..
2. Remove the power outer mirror switch..
3. Verify that the continuity between the power outer mirror switch terminals
is as indicated in the table.
If not as indicated in the table, replace the power outer mirror switch..
...
