Mazda CX-5 Service & Repair Manual: Cowl Upper Plate Installation [Panel Replacement]
Symbol Mark

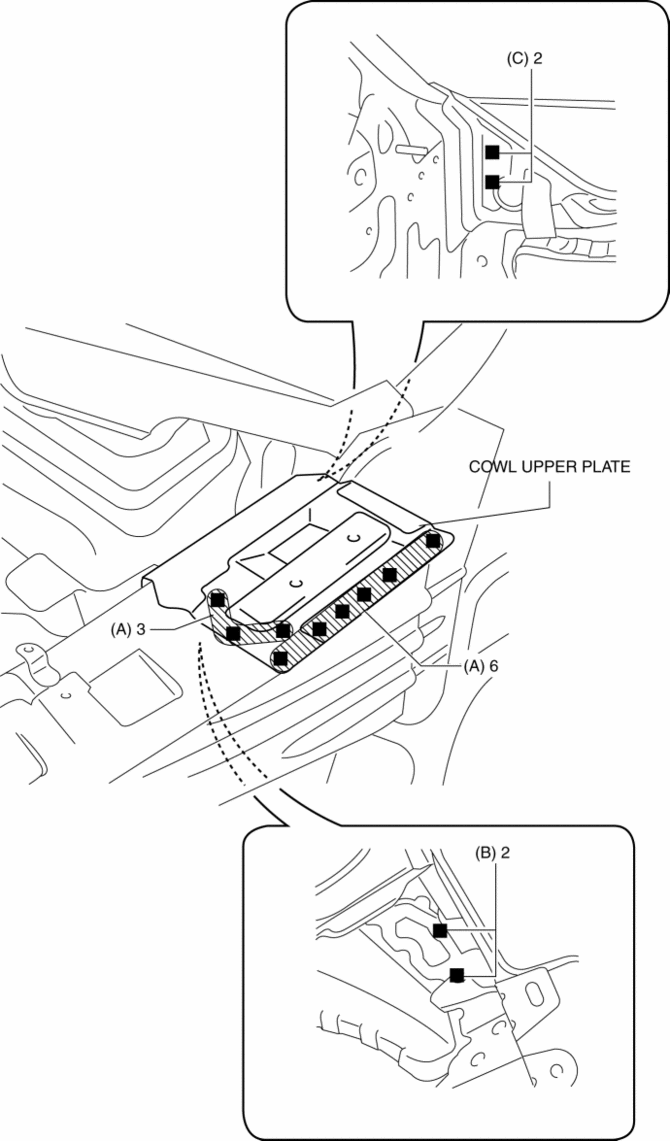
Installation Procedure
1. When installing new parts, measure and adjust the body as necessary to conform with standard dimensions.
2. Drill holes for the plug welding before installing the new parts.
3. After temporarily installing new parts, make sure the related parts fit properly.
4. Plug weld the 9 locations indicated by (A) shown in the figure.
5. Plug weld the 2 locations indicated by (B) from the front wheel housing side shown in the figure.
6. Plug weld the 2 locations indicated by (C) from the inside shown in the figure, then install the cowl upper plate.
 Cowl Panel Removal/Installation
1. Disconnect the negative battery cable..
2. Remove the following parts:
a. Windshield wiper arm and blade.
b. Cowl grille.
c. Windshield wiper motor.
d. Keyless beeper.
3. Remove clips A ...
 Cowl Upper Plate Removal [Panel Replacement]
Symbol Mark
Removal Procedure
1. Drill the 9 locations indicated by (A) shown in the figure.
2. Drill the 2 locations by (B) from the front wheel housing side shown in the
figure.
3. Drill ...
Other materials:
Transaxle Range Sensor [Fw6 A EL, Fw6 Ax EL]
Purpose/Function
The transaxle range sensor detects the position of the manual valve and selector
lever.
The transaxle range sensor signal is used for automatic shift control, manual
shift control, TCC control, line pressure control, direct electric shift control,
learning co ...
Rear View Monitor
Rear View Monitor
The rear view monitor is a visual assist system when reversing the vehicle that
provides images from the rear of the vehicle.
WARNING
Always drive carefully confirming the safety of the rear and the surrounding
conditions by looking directly with your eyes:
Reversing the ve ...
Antenna Feeder No.3 Inspection
1. Disconnect the negative battery cable..
2. Remove the following parts:
a. Front scuff plate.
b. Rear scuff plate.
c. B-pillar lower trim.
d. Front seat belt adjusting cover.
e. Front seat belt upper anchor installation bolt.
f. B-pillar upper trim.
g. Rear seat cushion.
h. Trunk ...
