Mazda CX-5 Service & Repair Manual: Cowl Grille Removal/Installation
1. Remove the windshield wiper arm and blade..
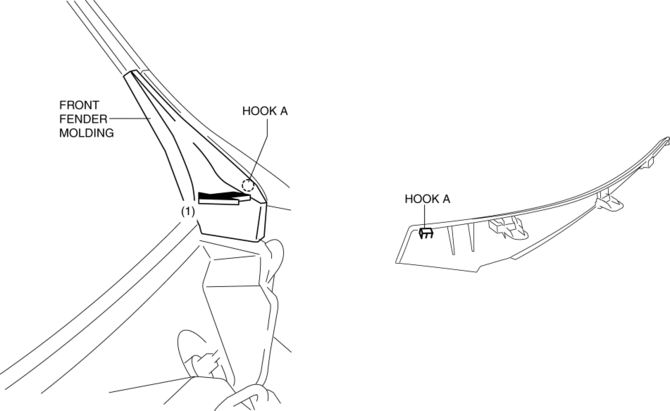
2. Pull the front fender molding in the direction of the arrow (1) while detaching hook A.
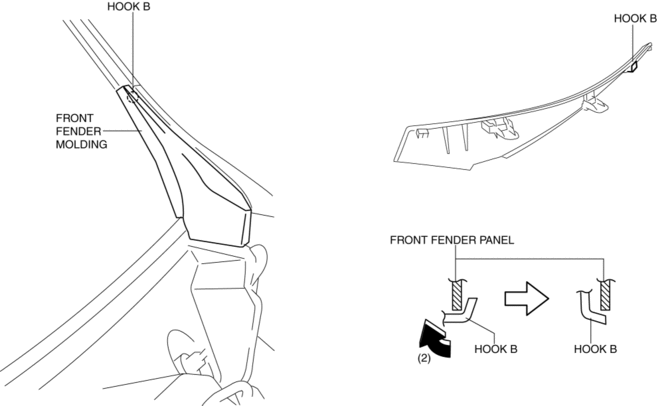
3. Pull the front fender molding in the direction of the arrow (2) while detaching hook B.
4. Pull the front fender molding in the direction of the arrow (3) and remove it while detaching tab C.

5. Remove fasteners D shown in the figure.
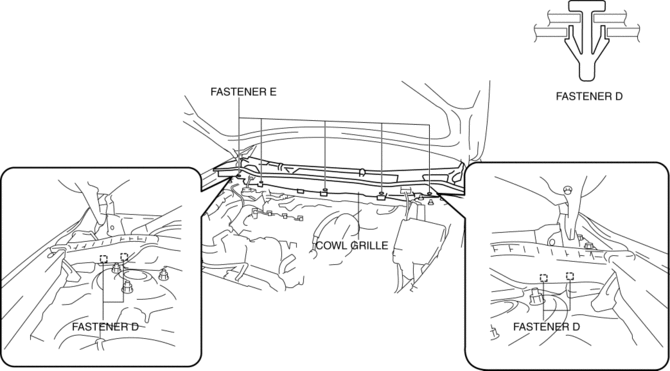
6. Remove fasteners E shown in the figure.
7. Disconnect the join pipe A of the windshield washer hose..
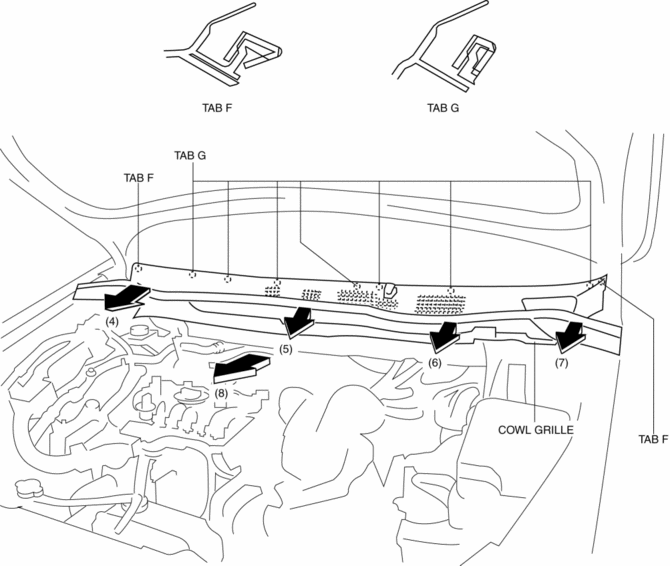
8. Pull the cowl grille in the direction of the arrow in the order of (4), (5), (6), (7), (8) and remove it while detaching tabs F, tabs G.
9. Install in the reverse order of removal.
 Center Under Cover Removal/Installation
1. Lift up the vehicle.
2. Remove the floor under cover..
3. Remove bolts.
2WD
AWD
4. Remove the center under cover.
5. Install in the reverse order of removal. ...
 Cowl Panel Removal/Installation
1. Disconnect the negative battery cable..
2. Remove the following parts:
a. Windshield wiper arm and blade.
b. Cowl grille.
c. Windshield wiper motor.
d. Keyless beeper.
3. Remove clips A ...
Other materials:
Rear Seat Back Trim Removal/Installation
6:4 Split Type
1. Remove the trunk board..
2. Remove the rear seat back..
3. Remove the headrest.
4. Remove the rear seat back frame..
5. Remove the C rings in the order of (1), (2), (3), and (4) shown in the figure,
and remove the rear seat back trim from the rear seat back pad.
CA ...
Tire Maintenance
Improper or inadequate vehicle maintenance can cause tires to wear abnormally.
Here are some important maintenance points:
Tire Inflation Pressure
Inspect all tire pressure monthly (including the spare) when the tires are cold.
Maintain recommended pressures for the best ride, top handling, an ...
Seat Belt Precautions
Seat belts help to decrease the possibility of severe injury during accidents
and sudden stops. Mazda recommends that the driver and all passengers always wear
seat belts.
All of the seat belt retractors are designed to keep the lap/shoulder belts out
of the way when not in use.
The driver&# ...
