Mazda CX-5 Service & Repair Manual: Clutch Pedal Position Switch Removal/Installation [C66 M R]
1. Disconnect the negative battery cable..
2. Disconnect the clutch pedal position switch connector.
3. Rotate the clutch pedal position switch 45° counterclockwise.
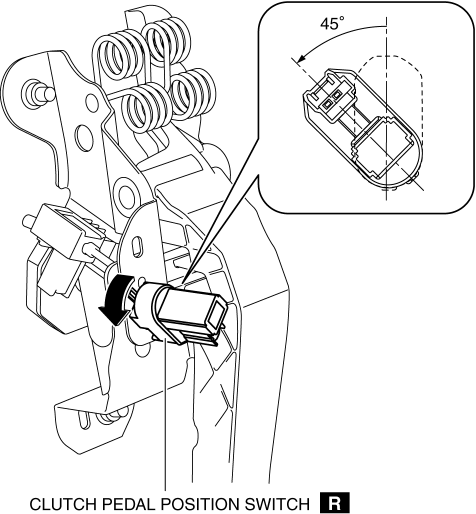
4. Remove the clutch pedal position switch from the clutch pedal.
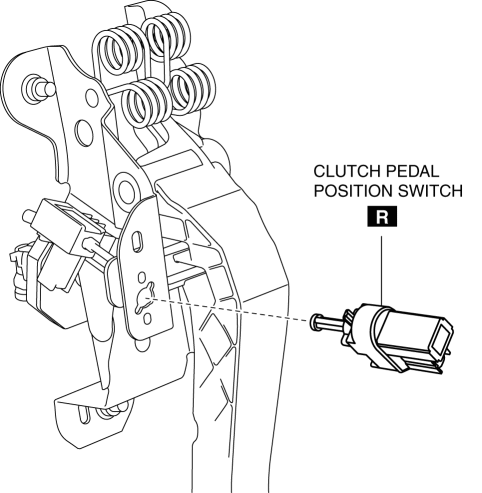
5. Insert a new clutch pedal position switch into the clutch pedal hole until the switch stops.
6. Rotate the clutch pedal position switch 45° clockwise.
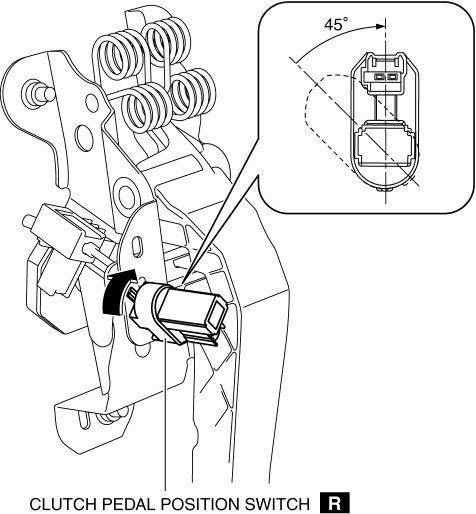
7. Verify that the clutch pedal position switch is locked securely.
8. Install in the reverse order of removal.
 Clutch Pedal Position (CPP) Switch [Skyactiv G 2.0]
Purpose/Function
Detects the connection status of the clutch.
Construction
Installed on the clutch pedal.
An ON/OFF type switch has been adopted.
Operation
...
 Clutch Pedal Removal/Installation [C66 M R]
CAUTION:
Secure the steering wheel using tape or a cable to prevent the steering shaft
from rotating after disconnecting the steering shaft. If the steering wheel
rotates after the steer ...
Other materials:
Air Intake Actuator Inspection [Full Auto Air Conditioner]
1. Connect battery positive voltage to air intake actuator terminal B (or C),
connect terminal C (or B) to ground, and then verify that the air intake actuator
operates as shown in the table.
If the operation condition is not normal, replace the air intake actuator.
...
Front Fog Lights Indicator Light
Purpose
Notifies the user that the front fog lights are illuminated.
Function
Illuminates when the front fog light illumination conditions are met.
Construction
Displayed in the instrument cluster.
Operation
1. With the light switch in the TNS, HEAD, or ...
Windshield Washer Hose Removal/Installation
1. Disconnect the negative battery cable..
2. Remove the front over fender..
3. Remove the mudguard (RH)..
4. Remove the windshield wiper arm and blade..
5. Disconnect the windshield washer hose A from the washer motor.
6. Remove the windshield washer hose A from the washer tank hook.
7. ...
