Mazda CX-5 Service & Repair Manual: Clock Spring Adjustment [Two Step Deployment Control System]
1. Set the front wheels straight ahead.
CAUTION:
-
The clock spring will break if over?wound. Do not forcibly turn the clock spring.
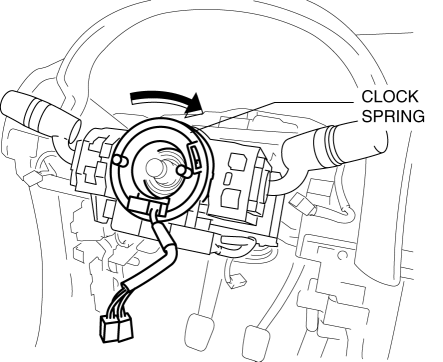
2. Turn the clock spring clockwise until it stops.

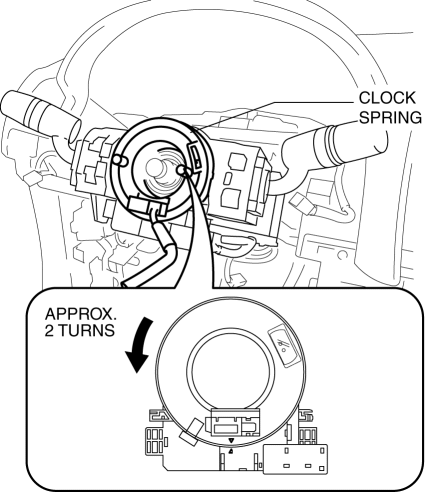
3. Turn the clock spring counterclockwise approx. 2 turns
.

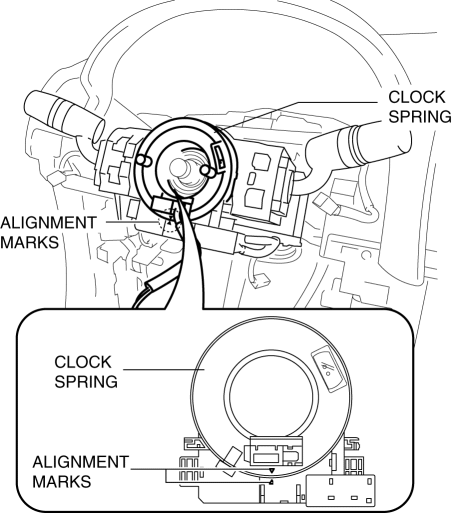
4. Align the mark on the clock spring with the mark on the outer housing.


NOTE:
-
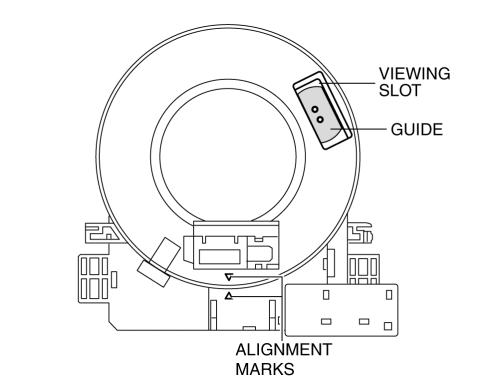
After adjusting the alignment marks, the guides can be verified in the viewing slots shown in the figure.
 Clock Spring Adjustment [Standard Deployment Control System]
1. Set the front wheels straight ahead.
CAUTION:
The clock spring will break if over?wound. Do not forcibly turn the clock
spring.
2. Turn the clock spring clockwise until it stops. ...
 Clock Spring Inspection [Standard Deployment Control System]
1. Disconnect the negative battery cable and wait for 1 min or more..
2. Remove the driver?side air bag module..
3. Remove the steering wheel..
4. Remove the column cover..
5. Remove the cloc ...
Other materials:
Turn Signal/Hazard Warning Indicator Lights
Purpose
Notifies the driver that a turn light, the hazard warning lights are flashing.
Function
Flashes according to the turn switch and hazard warning switch operations.
Construction
Displayed in the instrument cluster.
Operation
Turn system
1. When th ...
Air Bag System Warning Light [Standard Deployment Control System]
Purpose
The air bag system warning light notifies the driver of a malfunction in
the SRS air bag system.
Function
If a malfunction occurs in the SRS air bag system, the air bag system warning
light illuminates or flashes.
Construction
LEDs (light-emitting d ...
Air Intake Control [Full Auto Air Conditioner]
Purpose
The air intake control switches the air intake port (FRESH/REC) according
to the vehicle environment.
Function
The air intake control drives the air intake actuator and switches the air
intake door position according to the operations of the REC, FRESH and defroster ...
