Mazda CX-5 Service & Repair Manual: Center Pillar Removal [Panel Replacement]
Symbol Mark

Removal Procedure
CAUTION:
-
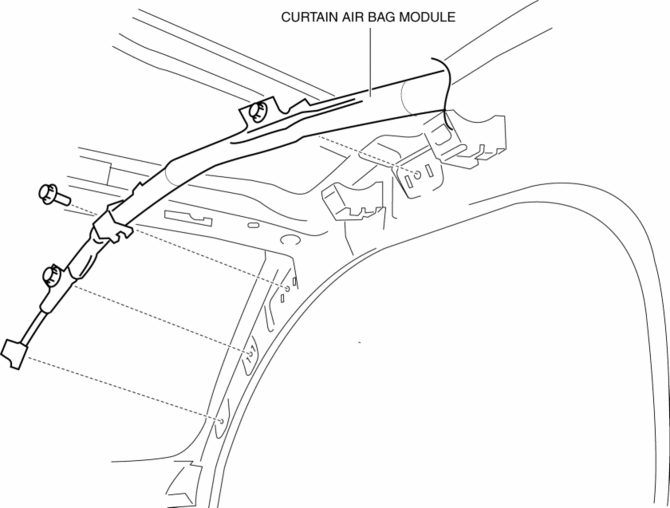
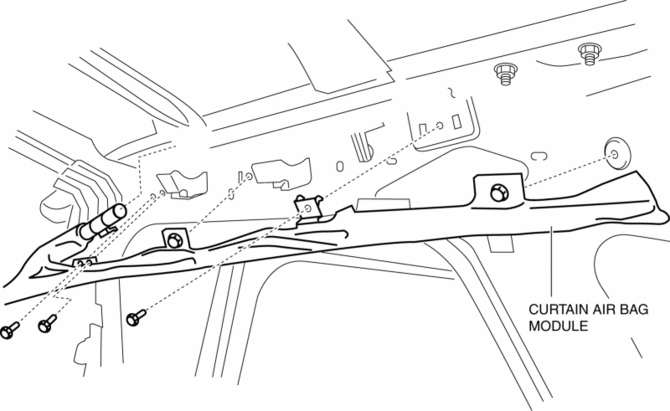
Remove the curtain air bag module to prevent damage before servicing.
Front-side
Rear-side
CAUTION:
-
Avoid cutting with a blowtorch or similar tools as the insulator (shaded area) is flammable.
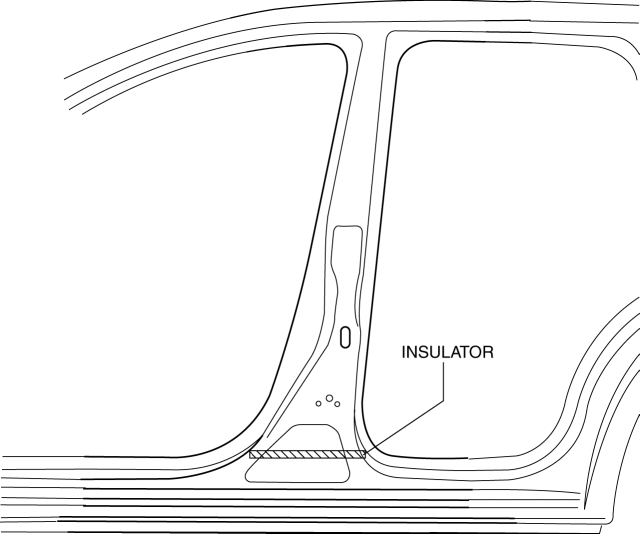
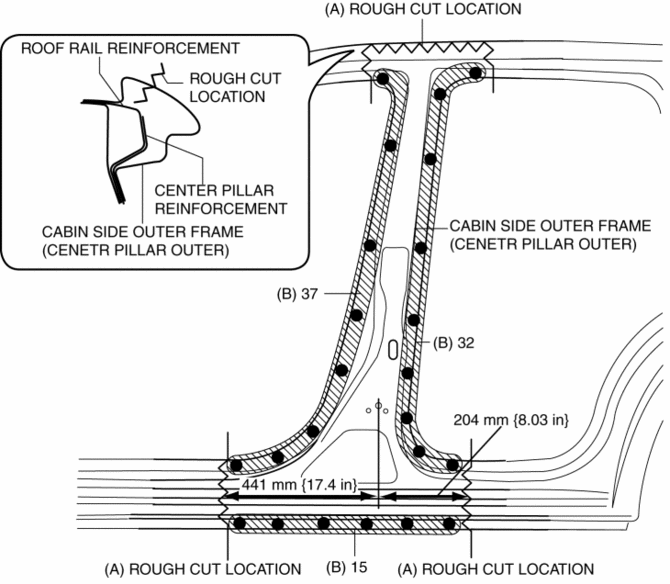
1. Rough cut the area locations indicated by (A).
2. Drill the 84 locations indicated by (B) shown in the figure then remove the cabin side outer frame (outer center pillar).
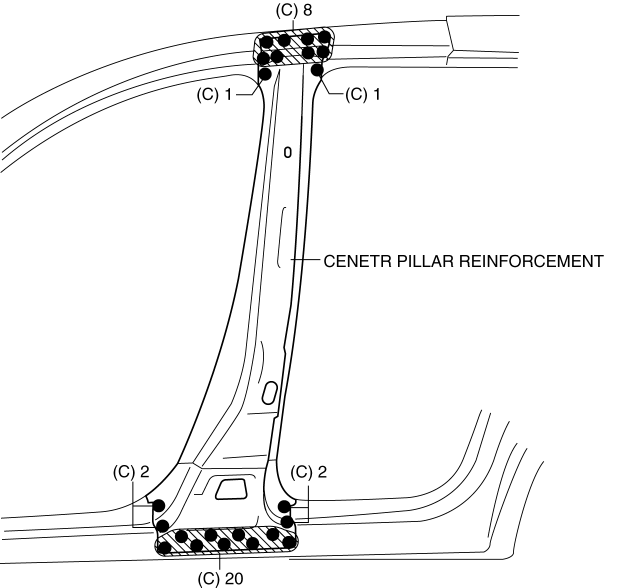
3. Drill the 34 locations indicated by (C) shown in the figure then remove the center pillar reinforcement.
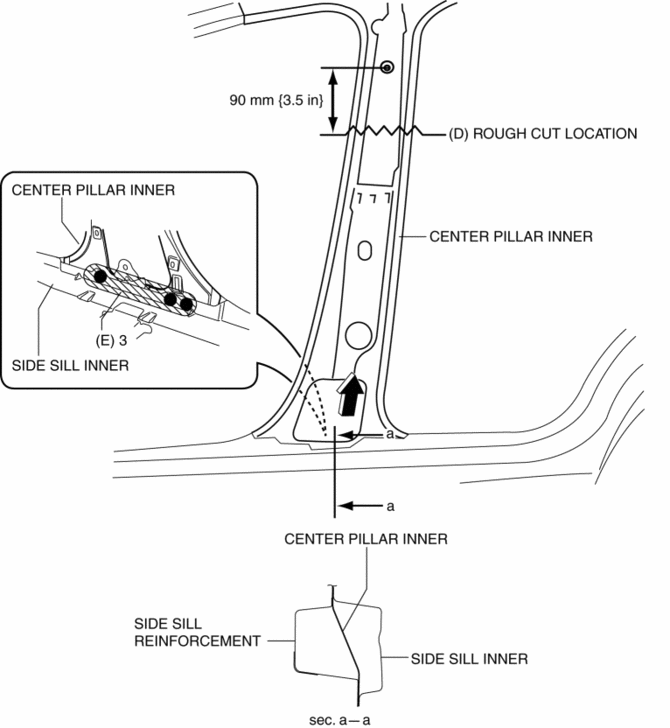
4. Rough cut the area locations indicated by (D).
5. Drill the 3 locations indicated by (E) shown in the figure.
6. Pull the inner center pillar in the direction of arrow shown in the figure, then remove it from between the inner side sill and side sill reinforcement.
 Center Pillar Installation [Panel Replacement]
Symbol Mark
Installation Procedure
1. When installing new parts, measure and adjust the body as necessary to conform
with standard dimensions.
2. Drill holes for the plug welding before inst ...
 Construction Standard Values [Construction Standard Values]
Front view
No.
Measurement part
Standard values (mm {in})
Maximum values (mm {in})
Minimum values (mm {in})
Side ...
Other materials:
Coolant Reserve Tank Removal/Installation
1. Remove in the order indicated in the table.
2. Install in the reverse order of removal.
1
Wiring harness
2
Hose
3
Coolant reserve tank
(See Coolant Reserve Tank Removal Note.)
Coolant Reserve Ta ...
Shift Solenoid No.2 [Fw6 A EL, Fw6 Ax EL]
Purpose/Function
Shift solenoid No.2 adjusts the hydraulic pressure in the 2-6 brake circuit
based on the current demand from the TCM according to the vehicle conditions.
Construction
Shift solenoid No.2 is installed to the solenoid control valve body.
Shift solenoid N ...
Torque Converter Clutch (TCC) Control [Fw6 A EL, Fw6 Ax EL]
Outline
For TCC control, a newly developed, full range TCC control has been adopted.
The TCC range has been significantly widened by having the smoothness unique
to the torque converter during acceleration from a stop take precedence and
actively controlling TCC directly after accele ...
