Mazda CX-5 Service & Repair Manual: Cargo Compartment Light Removal/Installation
1. Disconnect the negative battery cable..
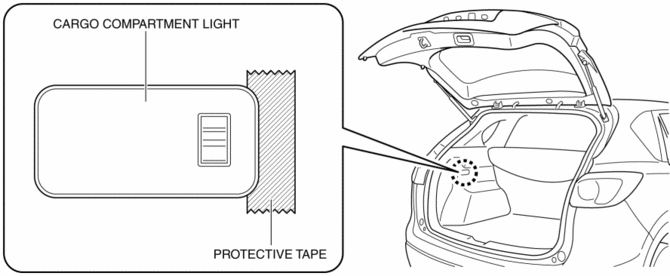
2. To prevent scratches or damage, affix protective tape to the position shown in the figure.
CAUTION:
-
If a flathead screwdriver is inserted into the gap between the cargo compartment light and trunk side trim, the trunk side trim could interfere with the flathead screwdriver and be damaged. When removing the cargo compartment light from the trunk side trim, perform the procedure after affixing protective tape to the trunk side trim.

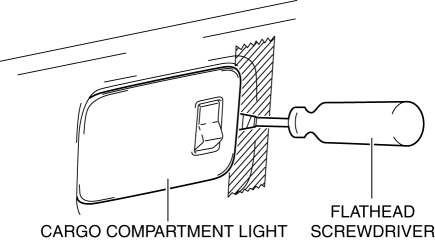
3. Insert a tape-wrapped flathead screwdriver into the gap between the cargo compartment light and trunk side trim shown in the figure.

4. Move the flathead screwdriver in the direction of the arrow (1) shown in the figure, pull out the cargo compartment light from the trunk side trim, and detach the cargo compartment light tab and trunk side trim.

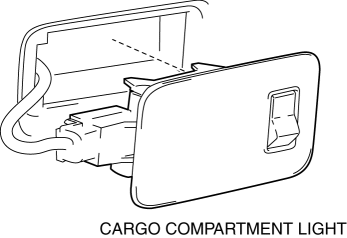
5. Remove the cargo compartment light.

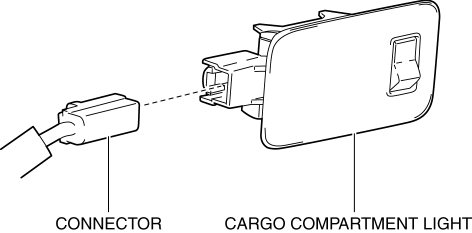
6. Disconnect the connector.

7. Install in the reverse order of removal.
 Cargo Compartment Light Inspection
1. Disconnect the negative battery cable..
2. Remove the cargo compartment light..
3. Verify that the continuity between the cargo compartment light terminals is
as indicated in the table.
...
 Lighting System Personalization
A personalization function has been adopted with which settings for each
function can be changed.
The following settings for the auto light system and interior light control
system ...
Other materials:
Front Oil Seal Replacement
WARNING:
A hot engine can cause severe burns. Turn off the engine and wait until it
is cool before servicing.
1. Remove the front under cover No.2..
2. Remove the splash shield..
3. Remove the drive belt..
4. Remove in the order indicated in the table.
5. Install in the reve ...
Differential [C66 M R]
Purpose, Function
The differential absorbs the rotation speed of the inside and outside wheel
of a wheel set when the vehicle is cornering.
Construction
Operation
Driving in a straight line
Cornering
...
Cup Holder
WARNING
Never use a cup holder to hold hot liquids while the vehicle is moving:
Using a cup holder to hold hot liquids while the vehicle is moving is dangerous.
If the contents spill, you could be scalded.
Do not put anything other than cups or drink cans in cup holders:
Putting objects other ...
