Mazda CX-5 Service & Repair Manual: Bumper Stiffener Lower Removal/Installation
1. Disconnect the negative battery cable..
2. Remove the following parts:
a. Seal board upper.
b. Front bumper.
c. Seal plate.
d. Front under cover No.1.
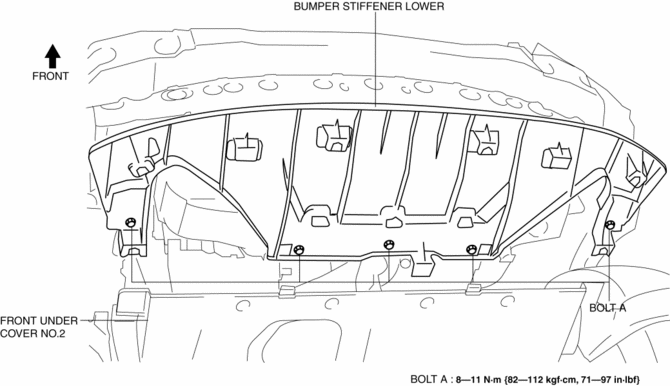
3. Remove bolts A.
4. Pull the bumper stiffener lower in the direction of the arrow (1), (2) shown in the figure, detach hooks B.
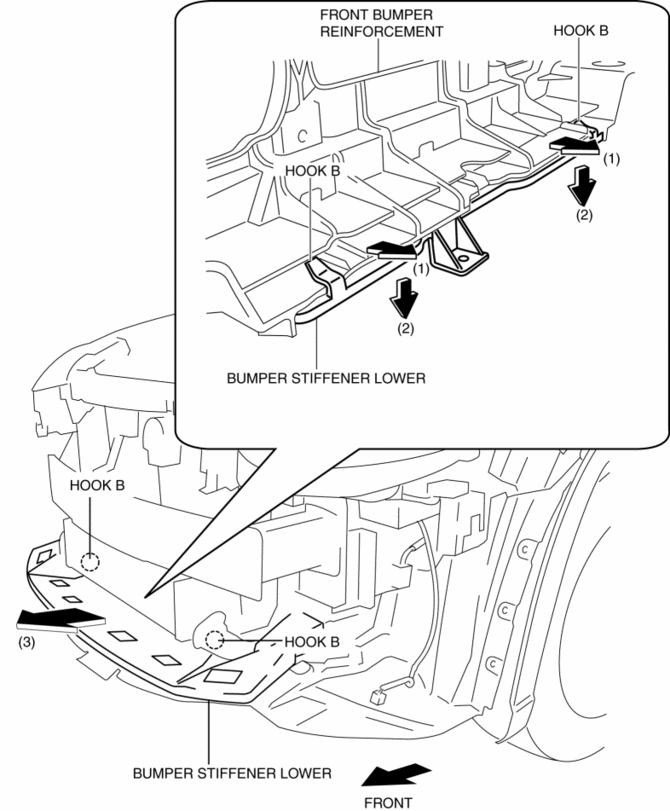
5. Remove the bumper stiffener lower in the direction of the arrow (3) shown in the figure.
6. Install in the reverse order of removal.
 Bumper Slider Removal/Installation
Front Bumper Slider
1. Disconnect the negative battery cable..
2. Remove the seal board upper..
3. Remove the front bumper..
4. Remove bolts A.
5. Pull the front bumper slider in the dire ...
 Center Under Cover Removal/Installation
1. Lift up the vehicle.
2. Remove the floor under cover..
3. Remove bolts.
2WD
AWD
4. Remove the center under cover.
5. Install in the reverse order of removal. ...
Other materials:
Tcs Control
Outline
The TCS control actuates torque reduction through engine control, as well
as using brake control to control traction.
NOTE:
Engine control: Engine output is lowered by fuel cut and ignition timing
control to reduce the traction, preventing driving wheel slip.
...
Steering Gear And Linkage Inspection
1. Remove the steering gear and linkage..
2. Remove the tie-rod end and boot..
3. Measure the rotation torque of the pinion shaft using a crescent wrench and
pull scale. (speed measurement reference 5 В°/s)
a. Install the crescent wrench to the steering gear.
b. Measure the length fr ...
Front Side Frame (Partial Cutting) Removal [Panel Replacement]
Symbol Mark
Removal Procedure
1. Drill the 4 locations indicated by (A) shown in the figure, then remove suspension
mounting reinforcement and outer frame reinforcement.
2. Rough cut location indicated by (B) shown in the figure.
3. Drill the 6 locations indicated by (C) shown in the fig ...
