Mazda CX-5 Service & Repair Manual: Brake/Taillight Bulb Removal/Installation
1. Disconnect the negative battery cable..
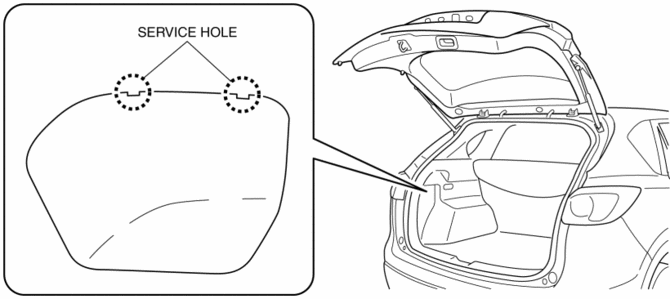
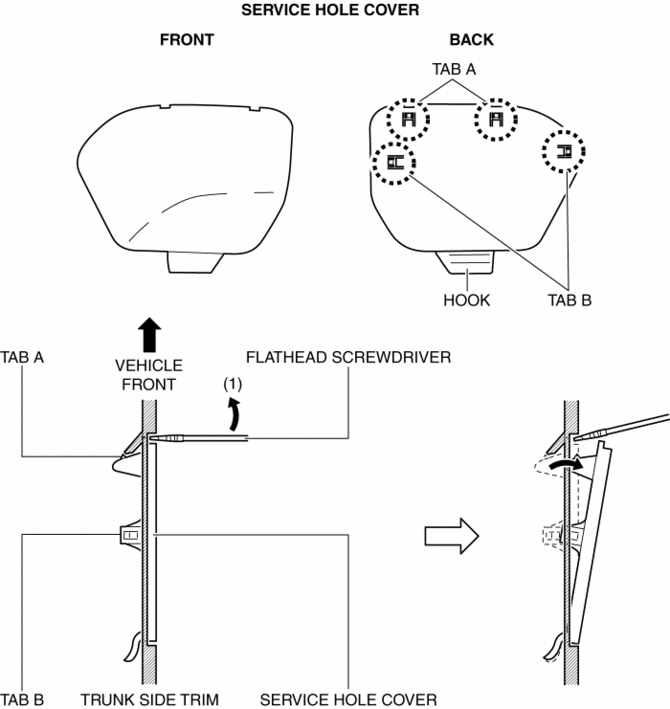
2. Insert a tape-wrapped flathead screwdriver into the service hole in the position shown in the figure.
3. Move the flathead screwdriver in the direction of the arrow (1) shown in the figure, pull out the service hole cover, and detach the service hole cover tab and trunk side trim.
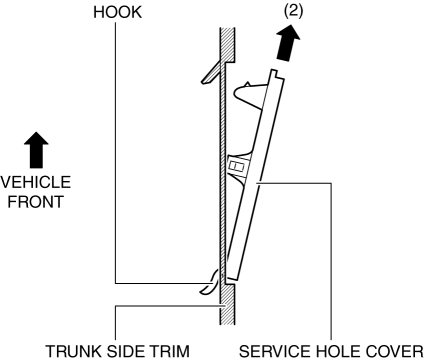
4. Pull out the service hole cover in the direction of the arrow (2) shown in the figure and pull out the service hole cover hook from the trunk side trim.
5. Remove the service hole cover.
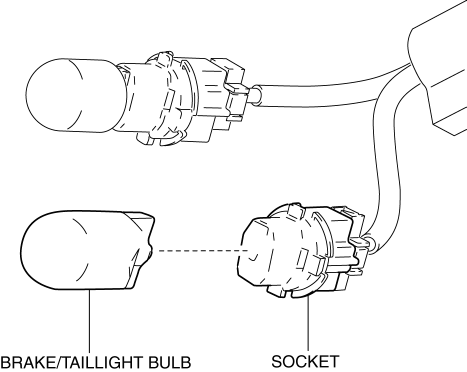
6. Rotate the socket in the direction of the arrow (3) shown in the figure and remove it from the rear combination light in the direction of the arrow (4) shown in the figure.
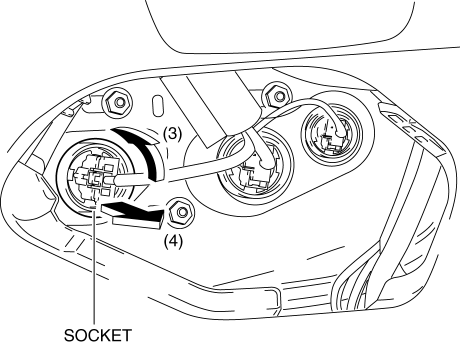
7. Remove the brake/taillight bulb.
8. Install in the reverse order of removal.
 Back Up Light Bulb Removal/Installation
1. Disconnect the negative battery cable..
2. Insert a tape-wrapped flathead screwdriver into the service hole in the position
shown in the figure.
3. Move the flathead screwdriver in the di ...
 DRL (Daytime Running Light) Bulb Removal/Installation
1. Disconnect the negative battery cable..
2. Disconnect the connector.
3. Rotate the DRL bulb in the direction of the arrow (1) shown in the figure
and remove it from the front combination ...
Other materials:
Lumber Support Motor Removal/Installation
WARNING:
Handling a side air bag improperly can accidentally operate (deploy) the
air bag, which may seriously injure you. Read the service warnings/cautions
in the Workshop Manual before handling the front seat (side air bag integrated)..
If the sliding mechanisms on both side ...
Rear Buckle Removal/Installation
1. Switch the ignition to off.
2. Disconnect the negative battery cable and wait for 1 min or more..
3. Press the release switch, then disconnect the rear center seat belt and rear
buckle.
4. Fold down the rear seat back.
5. Remove the trunk board..
6. Remove the bolt.
7. Remo ...
Antenna Feeder No.1 Inspection
With audio system
1. Disconnect the negative battery cable..
2. Remove the following parts:
a. A-pillar trim (RH).
b. Decoration panel.
c. Audio unit.
3. Disconnect antenna feeder No.2.
4. Verify that the continuity between antenna feeder No.1 terminals is as indicated
in the tabl ...
