Mazda CX-5 Service & Repair Manual: Back Up Light Bulb Removal/Installation
1. Disconnect the negative battery cable..
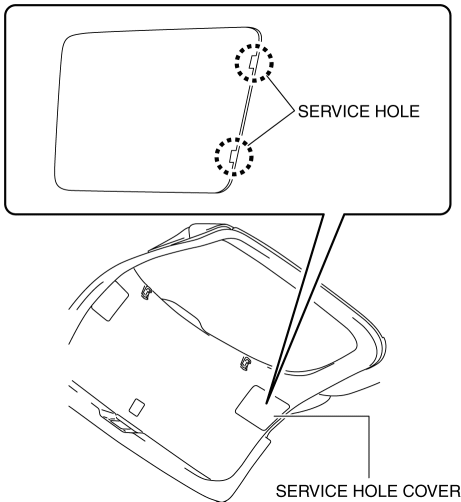
2. Insert a tape-wrapped flathead screwdriver into the service hole in the position shown in the figure.
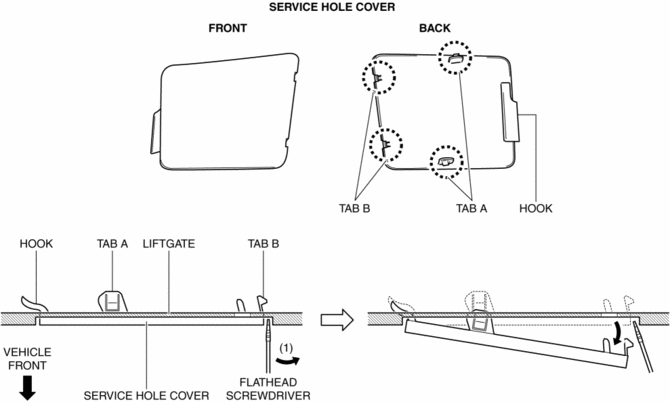
3. Move the flathead screwdriver in the direction of the arrow (1) shown in the figure, pull out the service hole cover from the liftgate, and detach the service hole cover tabs and liftgate connections.
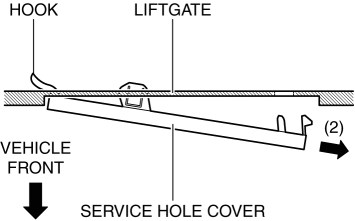
4. Pull out the service hole cover in the direction of the arrow (2) shown in the figure and pull out the service hole cover hook from the liftgate.
5. Remove the service hole cover.
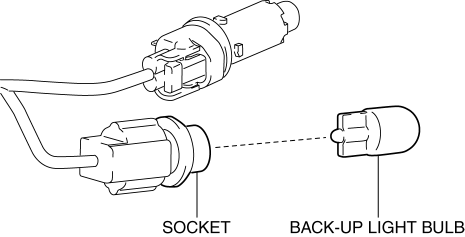
6. Rotate the socket in the direction of the arrow (3) shown in the figure and remove it from the liftgate light in the direction of the arrow (4) shown in the figure.
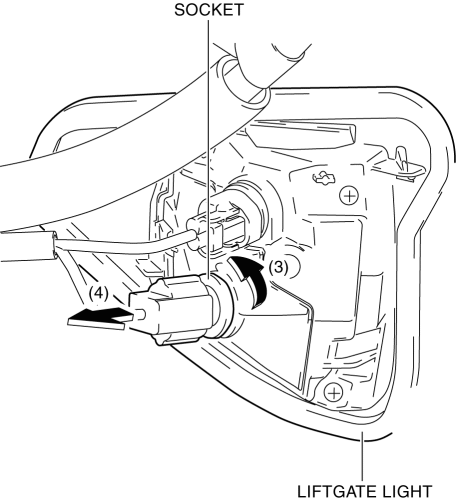
7. Remove the back-up light bulb.
8. Install in the reverse order of removal.
 Afs (Adaptive Front Lighting System) Control Module
Purpose
The AFS control module calculates the target optical axis based on the vehicle
height signal and outputs the target optical axis signal to the headlight leveling
actuator.
F ...
 Brake/Taillight Bulb Removal/Installation
1. Disconnect the negative battery cable..
2. Insert a tape-wrapped flathead screwdriver into the service hole in the position
shown in the figure.
3. Move the flathead screwdriver in the di ...
Other materials:
Cylinder Head Gasket Replacement
WARNING:
A hot engine can cause severe burns. Turn off the engine and wait until it
is cool before servicing.
Fuel vapor is hazardous. It can very easily ignite, causing serious injury
and damage. Always keep sparks and flames away from fuel.
Fuel line spills and leakag ...
Fuel Pressure Sensor
Purpose/Function
Detects the fuel pressure in the fuel distributor as basic information for
mainly determining the fuel injection amount.
Detects the fuel pressure in the fuel distributor and inputs it to the PCM
as a fuel pressure signal.
Construction
Installed on ...
Check Valve Inspection
Except U.S.A. And CANADA
1. Remove the check valve..
2. Verify that there is no airflow when positive pressure is applied to port
A.
If there is airflow, replace the check valve..
3. Verify that there is no airflow when negative pressure is applied to port
A.
If ther ...
