Mazda CX-5 Service & Repair Manual: Audio Unit Removal/Installation
Removal
1. Disconnect the negative battery cable.
2. Remove the decoration panel..
3. Remove the bolt.
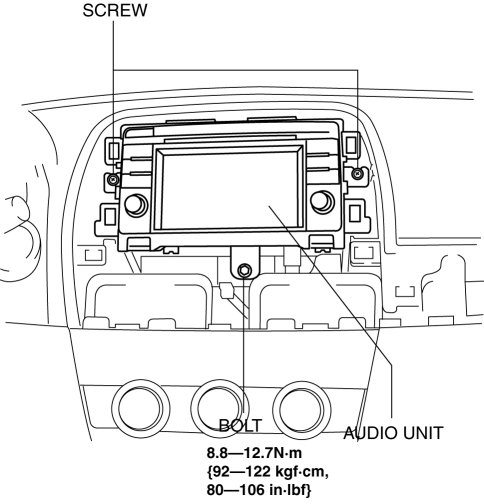
4. Remove the screws.
NOTE:
-
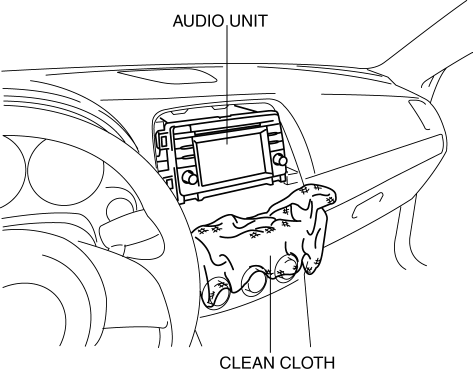
When removing the audio unit, the audio unit could interfere with the climate control unit and scratch the climate control unit. Perform the servicing by spreading a cloth in the position indicated in the figure.
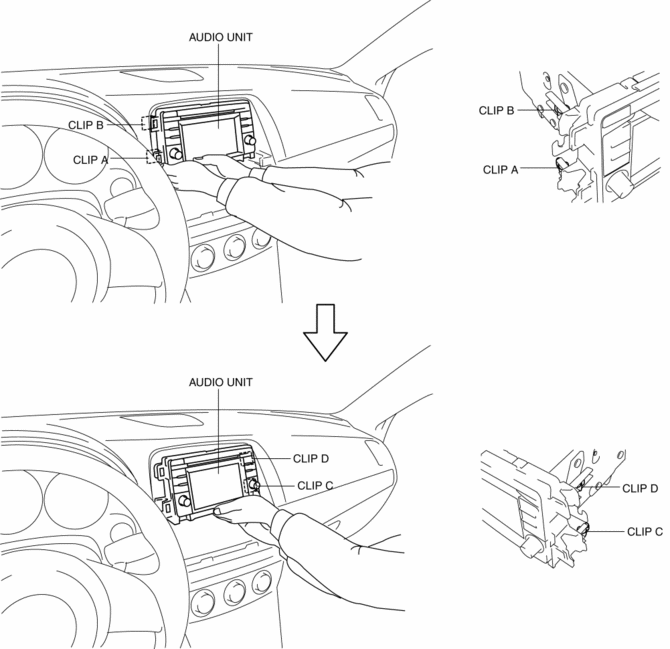
5. Hold the audio unit in the position shown in the figure and pull it outward to disengage clips A, B, C, and D from the instrument panel.
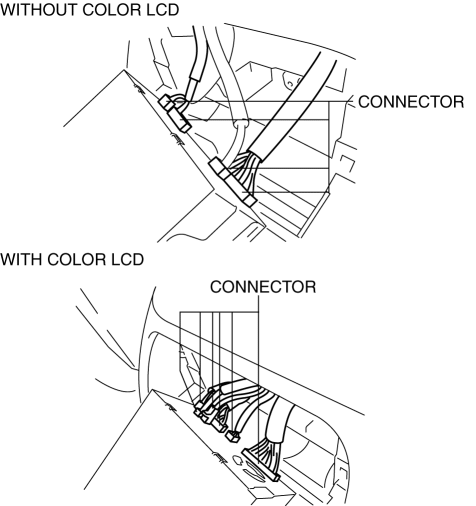
6. Disconnect the connectors.
7. Remove the audio unit.
Installation
NOTE:
-
When installing the audio unit, the audio unit could interfere with the climate control unit and scratch the climate control unit. Perform the servicing by spreading a cloth in the position indicated in the figure.
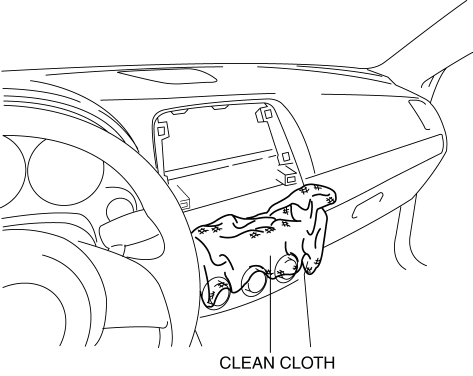
1. Connect all the connectors.

2. Temporarily position the audio unit on the ribs and align the hole positions of the instrument panel with clips.
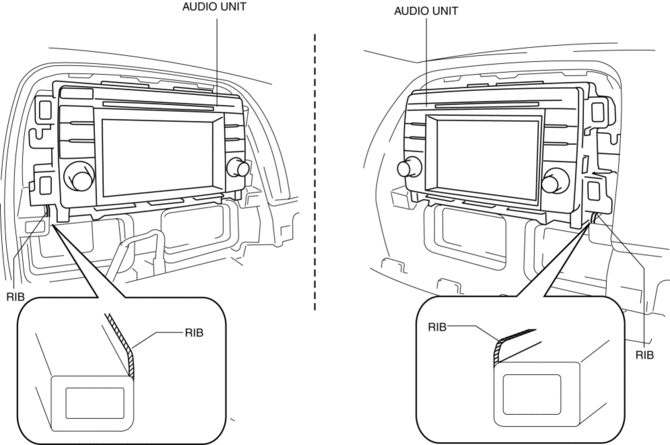
3. Press the audio unit in the position shown in the figure and engage clips to the instrument panel.
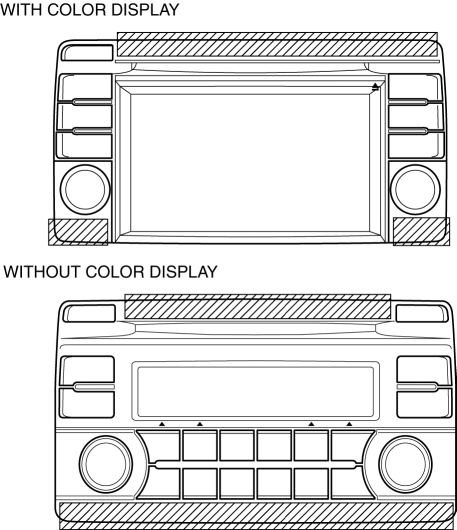
CAUTION:
-
If the audio unit switch area and screen are pressed it could cause a malfunction.
4. Install the screws.

5. Install the bolt.
6. Install the Decoration panel..
7. Connect the negative battery cable..
 Audio Unit Personalization Features Setting Procedure
Door Locks Systems
1. Switch the ignition ON (engine off or on).
2. Turn the audio unit power on.
3. Select the following from the audio unit screen.
a. “Setup”
b. “Vehicle”
c. “D ...
 Auxiliary Jack/Usb Port
NOTE:
“iPod” is a registered trademark of Apple Inc. in the United States and other
countries.
Purpose, Function
The Auxiliary jack/USB port outputs the audio signals of co ...
Other materials:
Pressure Sensor Removal/Installation [Two Step Deployment Control System]
WARNING:
Handling the pressure sensor improperly can accidentally operate (deploy)
the air bag module, which may seriously injure you. Read the air bag system
service warnings and cautions before handling the pressure sensor..
1. Switch the ignition to off.
2. Disconnect the ne ...
Discharge Headlight Service Warnings
Discharge Headlight Service Warnings
When replacing a discharge headlight bulb, performing the servicing with
the negative battery cable connected or in a wet work area could result in electrocution.
When replacing a discharge headlight bulb, perform the servicing under the following
...
DSC HU/CM
Outline
A high reliability, reduced size and weight DSC HU/CM, integrating both the
DSC HU and the DSC CM, has been adopted.
DSC HU Part Purpose/Function
According to DSC CM signals, the DSC HU controls (on/off) each solenoid valve
and the pump motor, adjusts fluid pr ...
