Mazda CX-5 Service & Repair Manual: A Pillar Trim Removal/Installation
1. Partially peel back the seaming welt.
2. Take the shaded area shown in the figure, and pull the A-pillar trim in the direction of the arrow (1) while detaching clip A, clips B.
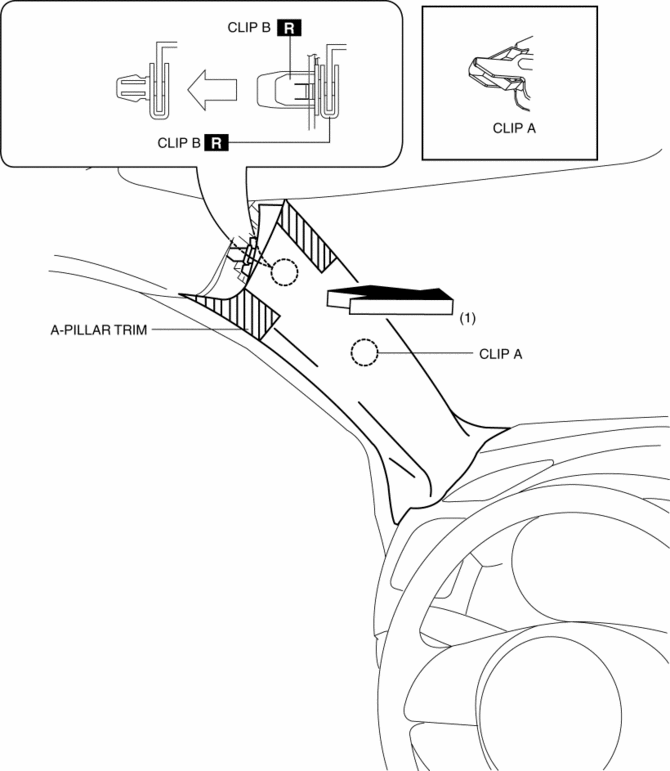
3. Cut the lead wire connecting clips B and grommet using a nipper.

4. Pull the A-pillar trim in the direction of the arrow in the order of (2) and remove the A-pillar trim while detaching guides C.

5. Move the hook in the direction of arrows (3) and (4) shown in the figure using a tape-wrapped flathead screwdriver and detach it from the front pillar inner panel.

6. Remove the grommet in the direction of the arrow (5) shown in the figure.
7. When installing the A-pillar, install new clips B and grommet to the A-pillar trim in advance.
8. Install in the reverse order of removal.
 General
...
 Anticorrosion, Sound Insulation, And Vibration Insulation
Body Sealing
Apply body sealer where necessary.
For locations where application of body sealer is difficult after installation,
apply it before installation.
Application of ...
Other materials:
Vacuum Pump Removal/Installation
1. Remove the plug hole plate..
2. Remove the battery..
3. Set the PCM wiring harness out of the way.
4. Disconnect the vacuum hose from the vacuum pump..
5. Remove in the order shown in the table.
6. Install in the reverse order of removal.
1
Vacuum hose
...
Sunroof Switch Inspection
1. Disconnect the negative battery cable..
2. Remove the front map light..
3. Verify that the continuity between the sunroof switch terminals is as indicated
in the table.
If not as indicated in the table, replace the sunroof switch.
...
Torque Converter Clutch (TCC) Control Solenoid [Fw6 A EL, Fw6 Ax EL]
Purpose/Function
The torque converter clutch (TCC) control solenoid adjusts the hydraulic
pressure in the TCC control circuit based on the current demand from the TCM
according to the vehicle conditions.
Construction
The TCC control solenoid is installed to the solenoid con ...
