Mazda CX-5 Service & Repair Manual: A/C Compressor
Purpose
-
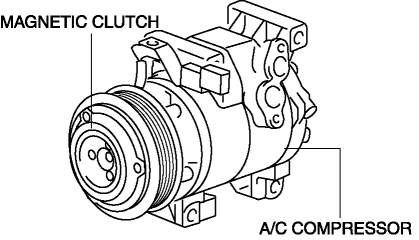
The A/C compressor circulates the refrigerant in the refrigerant cycle.
-
The A/C compressor compresses the gaseous refrigerant atomized by the evaporator, and by pressurizing the gaseous refrigerant, liquification by the condenser is facilitated.
Function
-
The A/C compressor compresses the gaseous refrigerant by driving the piston in the compressor using the drive force from the engine. In addition, it sends the compressed refrigerant to the condenser.
Construction
-
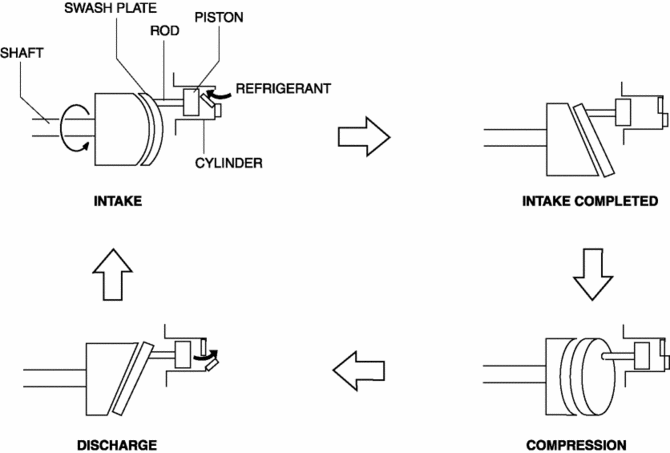
The A/C compressor has adopted a swash plate type compressor.
-
The A/C compressor consists of the following parts:

-
Shaft
-
Swash plate
-
Cylinder
-
Piston
Operation
-
When the drive force from the engine is transmitted to the compressor shaft by the operation of the magnetic clutch, the A/C compressor rotates the swash plate in the compressor. The rotation of the swash plate generates compression in the cylinder by the reciprocating movement of the piston.
1. When the piston moves downward, the suction valve opens and the refrigerant is discharged to the cylinder.
2. When the piston reaches the BDC, refrigerant charging is completed and the suction valve is closed.
3. When the piston moves upward, the refrigerant in the cylinder is compressed.
4. The compressed refrigerant presses open the discharge valve, and the high-temperature, highly pressurized refrigerant from the cylinder is discharged.

Fail-safe
-
Function not equipped.
 A/C
A/C
...
 A/C Compressor Control [Full Auto Air Conditioner]
Purpose
The A/C compressor control switches the A/C compressor on/off according to
the vehicle environment.
Function
The A/C compressor control turns the A/C compressor on/off b ...
Other materials:
Rear Crossmember Removal/Installation [2 Wd]
WARNING:
Verify that the rear crossmember is securely supported by a jack. If the
rear crossmember falls off, it can cause serious injury or death, and damage
to the vehicle.
CAUTION:
Performing the following procedures without first removing the rear ABS wheel-speed
s ...
Automatic Transaxle Shift Mechanism [Fw6 A EL, Fw6 Ax EL]
Outline
A sport AT-type shift mechanism has been adopted for all models.
An electric shift-lock system has been adopted to prevent driver mis-operation.
A manual shift-lock release system has been adopted to ensure emergency bypass
if shifting operations cannot be performed ...
Rear Brake (Disc)
Purpose/Function
Large diameter, solid-disc type front brakes with a 303 mm {11.9 in} diameter
and 10 mm {0.39 in} thickness have been adopted, improving braking force and
fade resistance.
Construction
Operation
When brake fluid is applied, the piston equipped on one s ...
